Getting Started
After registering with Dyn.rs Dyn.rs portal and successfully verifying your email address by
following the link in automatically generated mail message, on the Control Panel page you will see your
primary hostname username.dyn.rs that has been already created for you. If you need to use Dyn.rs from
several locations and different Internet connections, on this page you can create up to 4 additional 4th level
hostnames (hostname.username.dyn.rs). On the same page, by clicking the button
"Update Now" you can update the DNS data for your hostname with current
public IP address assigned to your Internet connection.
To enable regular automatic updates for your hostnames, you need to choose and implement one of the following methods:
- Configuring the DDNS router options (only if your router supports "Custom" configuration)
- Using our Windows Dyn.rs client program (if you use Windows OS)
- Using a Linux shell script, like this one (if you use Linux OS)
- Your own custom solution, which you can develop following our API V3 specification
Router configuration
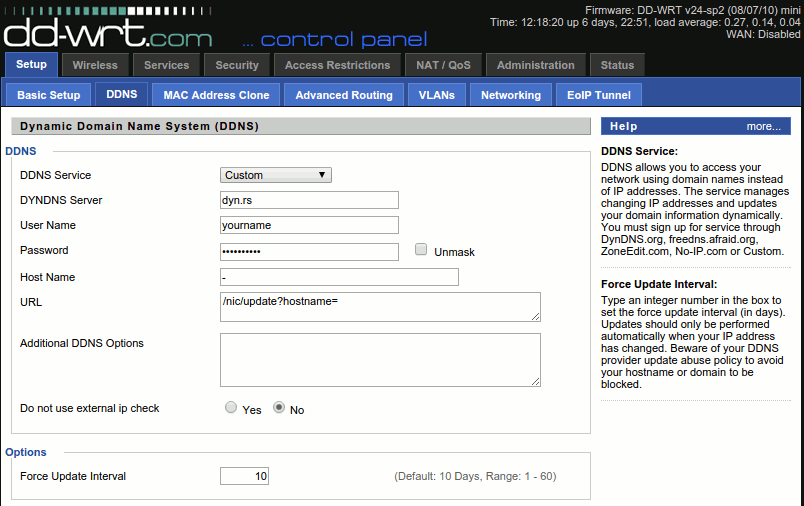
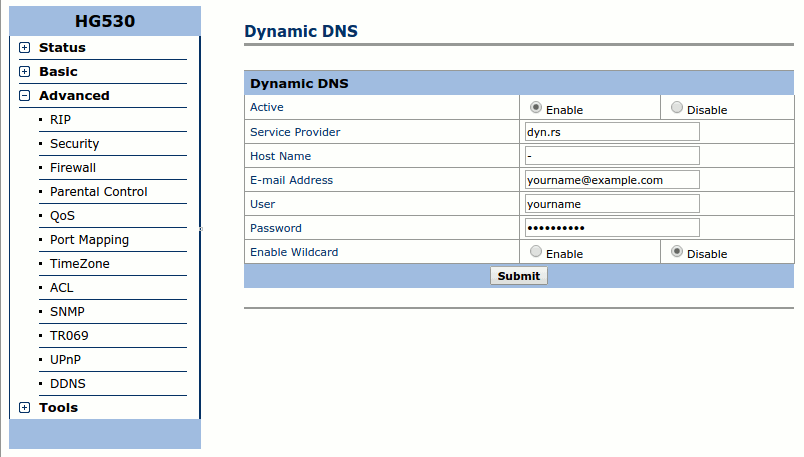
To update your primary hostname (e.g. username.dyn.rs), you can enter the full hostname, or just "-" (without quotes) as a Host Name.
To update any 4th level hostname (e.g. home.username.dyn.rs), enter just the first part of the hostname (home) in the given field.
For our Version 3 API, URL should be: /v3/update?hostname=
DD-WRT Example:
Huawei HG530 Example:
Dyn.rs Windows client configuration
Download and install Dyn.rs client application for Windows.
If you get any warnings during the download or installation, you can ignore it and go on with the process.
On Windows, in Internet Explorer browser, you can do that by clicking Actions in the lower part of the window, then Run anyway. You will get a ZIP archive which you need to
unpack and start the executable program DynRs_Setup_v3.exe.
The installation process itself is extremely simple and consists of only few clicks on the buttons Next and Finish. During the installation you can choose if you'd like the program to create a desktop shortcut icon, and finally whether you'd like the program to be run immediately or not. If you run the client, you will be immediately taken to the configuration window, the details of which are explained below.
After the successful configuration, the program will only be visible as an icon in your Task bar. You can right-click on the icon to get to the configuration options or to initiate the IP address update manually.
For this example we will use testuser as our username.
During the Dyn.rs registration process, the primary 3rd level hostname has been already created for you: username.dyn.rs (in our example case that's testuser.dyn.rs). Along with this primary hostname, you can create up to 4 more hostnames of 4th level: home.testuser.dyn.rs, office.testuser.dyn.rs, etc. Using the Dyn.rs portal, you can add or remove the additional hostnames at any time, while the primary hostname must exist as long as your Dyn.rs account. Any hostname has to be created on the dashboard page before it can be used or updated by the client program.
Windows Dyn.rs client can update one or more hosts at once. It will usually be your primary host. In case you have several locations that will use Dyn.rs, the easiest way is to have one update client on each location, each with its own hostname settings. To update more than one hostname simultaneously, you can specify them all in the Hostname field, separated by commas.
Let's start with the basic configuration. When you start the program for the first time:
1. Select the check/update frequency. We recommend setting the Update Interval to 5 minutes.
2. If you'd like the client to start automatically with Windows, make sure the checkbox Start with Windows is checked. Also, if you need the client to remeber the paused/unpaused state across restarts, check the option Remember paused state.
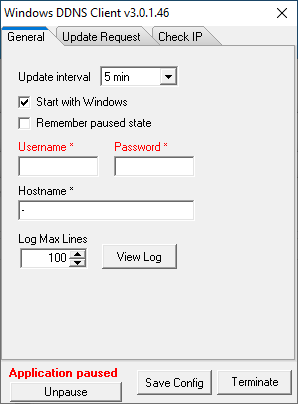
3. Enter your Dyn.rs username that has been successfully verified and activated, along with your chosen pasword).
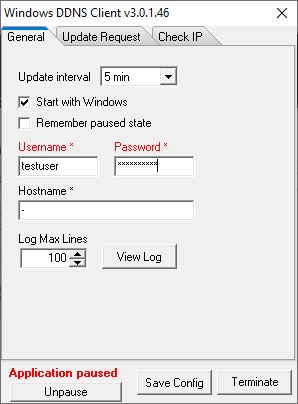
4. If this client will update your primary hostname, you can leave the Hostname field as it is by default (a single dash that means "no 4th level hostname"). However, if you will be updating one of your additional 4th level hostnames, you can enter either the full hostname here (e.g. home.testuser.dyn.rs), or just the 4th level part: home .

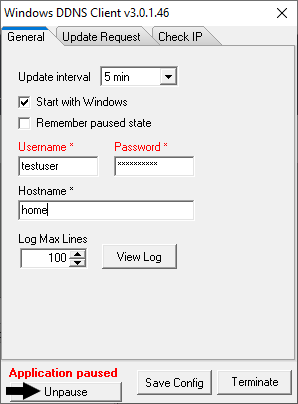
5. Click the Unpause button at the bottom of the window to activate the client, then Save Config.
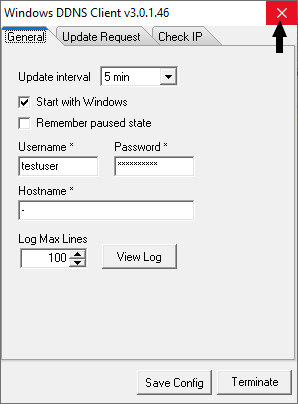
6. Finally, you can minimize the program window to system tray by simply closing it.
This completes the configuration of Dyn.rs Windows client. We wish you pleasant surfing! :)
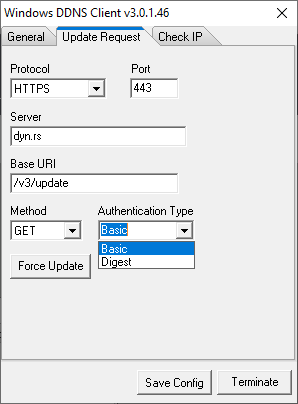
Advanced Configuration - Update Request Tab
For advanced usage and special user requirements, here are all the options available for tweaking the Update request. There's no need for any changes in this tab for use with Dyn.rs.
Advanced Configuration - Check IP Tab
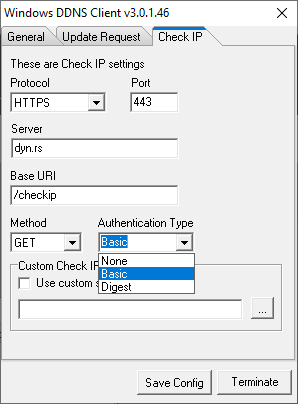
For advanced usage and special user requirements, here are all the options available for tweaking the Check IP request. There's no need for any changes in this tab for use with Dyn.rs.
